Here's a screencast explaining how it works. Read down further for a step-by-step walkthrough.
Step-by-step walkthrough:
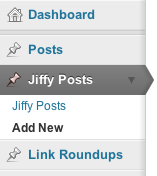
First, select "Add New" under "Jiffy Posts" in the left-hand menu of your WordPress dashboard.
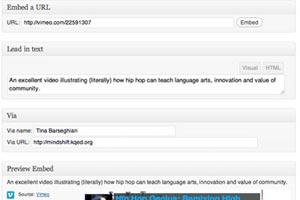
Embed the URL: When you get to the Jiffy Post screen, we recommend starting by embedding the URL you'd like to link to. Just paste the URL into the field shown below and click "Embed." From the URL, the tool will automatically extract a title (unless you've already provided one; see below), and a preview version of the link.

Title the post: By default, the Jiffy Post tool uses the title of the page linked as a title for the post, encased in quotes so that it's properly attributed to its source. But we recommend that you adjust the title to something that will be compelling to your site users and will work in the context of your site. (If you provide a title before or after you embed the URL, the Jiffy Post will use your title instead of the one that comes from the source.)
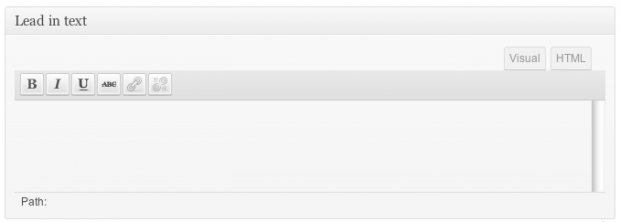
Write lead-in text: Next, add some lead-in text into the field shown below. We recommend no more than a sentence or two of text; just enough to add a bit of context for your users. Think of it as the equivalent of a status update on Twitter or Facebook.
Preview the link: The "Preview Embed" window (shown below) should give you a sense of exactly how your Jiffy Post will appear on your site, although not everything \will be a perfect match. In our experience, this should be enough to satisfy your needs most of the time, but if you have any doubt, just hit "Preview" in the Publish window to preview your post on your live site.
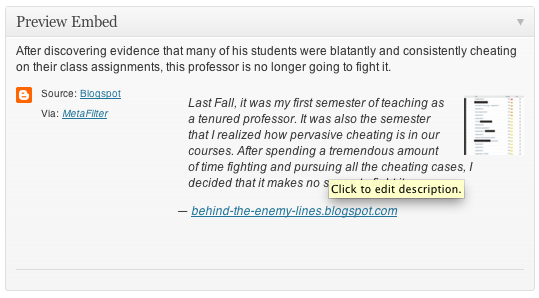
If necessary, edit the description: Most Jiffy Posts will appear with an excerpt from the source URL. You can edit this excerpt if you click on the description. Just hit "Update" to save your changes. You can also use the bookmarklet (see below) to choose which text is selected for that excerpt.
Use the Jiffy Post bookmarklet: At the lower-right-hand corner of the Add New Jiffy Post screen, you'll find a link for a Jiffy Post bookmarklet. Just drag this link into your browser toolbar, and whenever you'd like to create a new Jiffy Post, you can click the link for a direct shortcut. If you're Jiffy-Posting an article, and you highlight the text you'd like displayed in the excerpt of that article, the bookmarklet will use that highlighted text as the excerpt.
Troubleshooting
When I click on the title of a JiffyPost from my home page, I get a broken link (404 page)
Go to Settings > Permalinks page in your WordPress dashboard and click the "save changes" button. Clicking the "save changes" button flushes WordPress' rewrite rules and fixes permalinks for custom post types.
When I activate the plugin, existing queries that I'm running are no longer returning the results I expected.
Depending on the method you're using to return posts, you may need to set 'supress_filters' to true to prevent Jiffy Posts from interfering with your query. By default, get_posts() defaults to true, while query_posts() applies filters by default.
If 'suppress_filters' doesn't work, then you can remove the action ( add_action( 'pre_get_posts', array(&$this, 'add_to_query') ); ) from navis-jiffy-posts.php. This will prevent Jiffy Posts from conflicting with any existing queries, but will also remove Jiffy Posts from your main posts loop. You can add Jiffy Posts back to your posts loop by explicitly adding them via your theme's functions.php file. Check out the article "Showing custom post types on your home/blog page" for details.